Painting Metal Rails and Railings Outdoors

There’s usually at least one individual in every household who isn’t afraid of rolling up their sleeves and getting their hands dirty. Whether it’s everyday repairs around the house, a new coat of paint in the bedrooms or the odd DIY project in the garden, there isn’t much they won’t at least try their hand at.
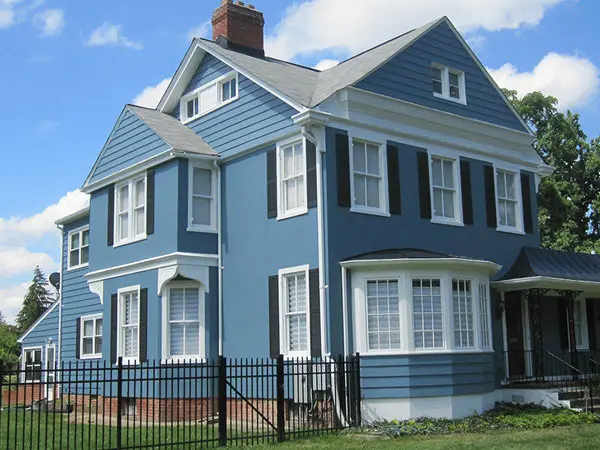
Nevertheless, there’s one particular duty which for some reason seems to be overlooked (or at least delayed) more readily than others. When it comes to metal rails, railings and similar features and fixtures outdoors, there seems to be a common habit of simply leaving them to their own devices, year after year.

Of course, it could simply be the fact that metallic outdoor features in general have such an extensive lifespan that they eventually become somewhat invisible to their respective owners. It could also be that if they are there simply to perform a functional duty – such as marking a boundary – it may be subconsciously determined that there are more important things to do that keep them in prime condition.
But here’s the thing – not only will occasional TLC help keep your outdoor metallic fixtures looking great and doing their job properly, but it isn’t nearly as difficult or unpleasant a process as you might think. There’s always the option of calling in the professionals, but if you’d prefer to go about things manually, there are really only four steps involved in restoring life to your outdoor metal rails and railings.
Which are as follows:
Step 1 – Prepare the Metal Surface
First of all, you’ll need to prepare the surface which of course means getting abrasive. Before even thinking about getting stuck into the job however, it’s critically important to acknowledge the fact that there is every chance any older paint on the metal rails may be lead-based. It’s always advisable to wear a dust mask when preparing a surface for painting, but in this instance if you are unsure about the paint that has been used, you might want to speak to the experts.
If it’s safe to go ahead, arm yourself with a wire brush, protective gloves and a dust mask before getting started clearing away as much old paint and surface rust as you can. Where you come across areas that have become rough, be sure to scrub these a little more intensively so as to bring them to the same level as the other undamaged areas of the surface. Where there is excess rust, you may need to use a grinding sander to once again smooth things down. In areas where there is no rust to speak of, take some medium grade sandpaper or a sanding sponge and work away at the surface gently until it is free of paint and as smooth as possible. This is also a good time to use masking tape to cover anything you do not want to paint.
Step 2 – Clean and Dry
It’s important that the metal surface is as clean and dry as possible, in order to ensure that the paint sticks in place properly. When you have finished the initial preparation process, take a clean cloth and wipe down the railings to get rid of as much dust and debris as possible. Removing the rust and paint should of course mean that there is no dirt left behind, but it is still worth double checking everything as you go.
Step 3 – Apply Primer
Never overlook the importance of primer if you want to get the job done properly. For the sake of convenience, it is easier to use a spray primer than the type that comes in a can and is applied using a brush. Sprays tend to be faster and eliminate the common problem of brush marks being left behind.
Make sure that the can is kept at least 6 inches from the surface being sprayed and continually move it from one area to the next, in order to avoid excessive build-up and drips. When you get from one end of the fixture to the other, give it a while to dry and revisit any areas where you note any missed spots or patches.
Step 4 – Paint
Be sure to give the primer exactly as long as the supplied instructions state that it needs to dry. If the primer is still wet, the paint won’t adhere properly. When you are fully satisfied that it is 100% dry, take some fine-grade sandpaper, moisten it in water and give the entire rail or railing a gentle rub. It’s a case of making sure that the surface is just very slightly rough, rather than chiseling away at the primer. After this, use a clean rag to remove the dust.
Last but not least, once again there are various options available in terms of types of paint to use, but spray paint is by far the easiest to work with. Give the can a good shake and slowly but surely apply it to the prepared metal surface in exactly the same way as the primer. When you have completed one coat, give it plenty of time to dry before once again using the fine sandpaper on it and applying another coat. Take your time and apply as many coats as necessary, in order to restore the metal to its former glory.
Shake your enamel paint can for about 30 seconds, and apply the color in the same way as you applied the primer. Once you have completed the first coat, leave it to dry thoroughly. It is always advisable to apply two coats for extra protection and coverage. Use the wet/dry paper again between coats to provide a freshly keyed area for the second coat of enamel paint, and then use the tack rag to clean any excess dust off. The second coat can then be applied to complete the task.


